Conditional Triggers – An Alternative Method for Setting Up Conditional Elementor Elements

In certain cases, you may find it necessary or preferable to create your dynamic content using an If-So trigger instead of directly setting the condition at the element level. This approach can be beneficial for the following reasons:
- The specific condition you want to use is only achievable through triggers (such as A/B testing, Schedule, and Start and End date).
- You’re interested in utilizing If-So’s integrated analytics system
- You want to create a sequence of “If Not” conditions (e.g., If X, then Y; if not, check if Z, etc.)
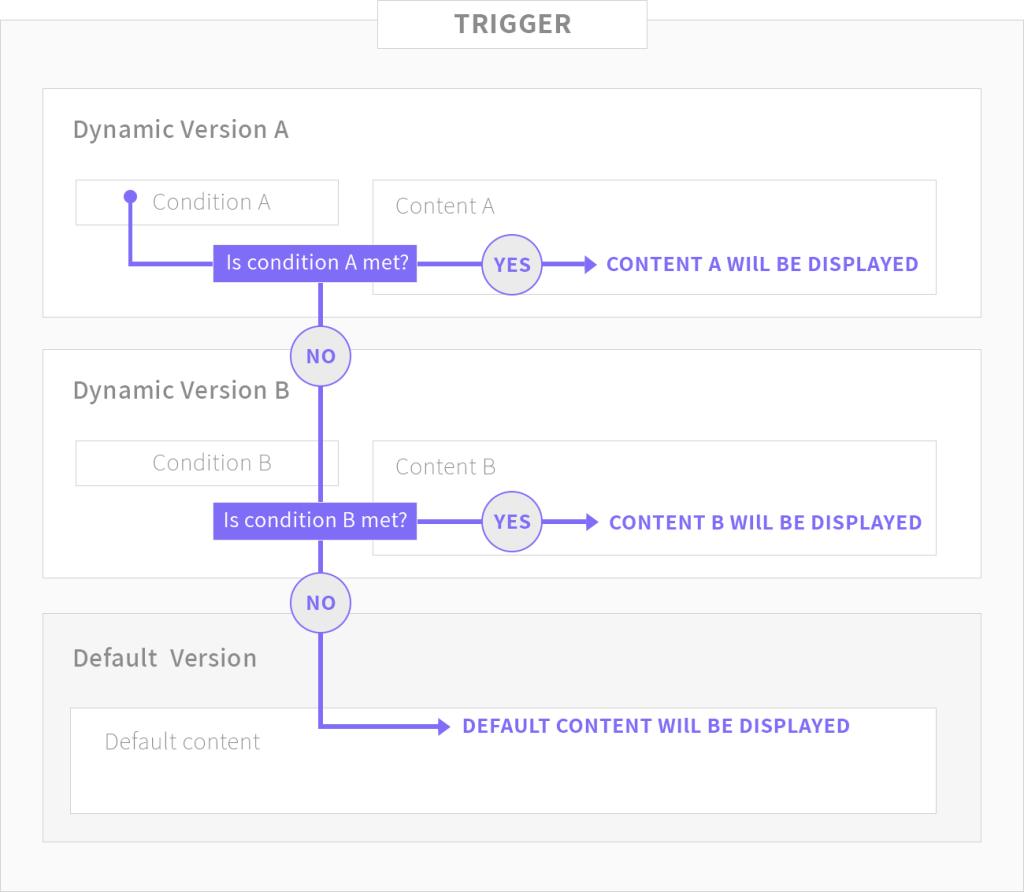
When you set up a trigger, If-So first checks the condition of the first content version, if it is met, the version is displayed, if not, it checks the condition of the next content version.
You can create as many versions as you want.

The limitation (and the solution)
One limitation of using triggers compared to conditional Elementor elements is that you cannot directly create your content using the Elementor editor within the trigger.
For simple text, images, or titles, you can create them directly inside the trigger editor (WYSIWYG editor). The content will automatically adopt the styling of the surrounding element on your page.
If you need or prefer to create your content using the Elementor builder, you can simply create it on your page, save it as an Elementor template, and then apply the template to the trigger using the template’s shortcode.
*The same method works if you want to apply the template to the default content field of another element.
Step-by-step, creating a conditional trigger
- On your WordPress dashboard, go to “If-So → Add New Trigger”.
- Click on “Select a condition” and select a condition.
- Paste the shortcode of the Elementor template into the content field of the respective version
- Repeat the above steps if you want to set up more dynamic versions.
- Configure a default content that will be displayed if none of the conditions are met.
- Press “Publish” and place the shortcode on your desired page to display the dynamic content. You can use a text, title, or shortcode element – all will work effectively.
Saving content as an Elementor template and applying it to the trigger
- Open the page you are editing with Elementor.
- Create and design the desired section or element.
- Select the section or element and right-click on the “Edit Section” button.
- A menu will appear with several options. Choose the “Save as Template” option.
- Provide a suitable name for your template and save it.
Obtaining the Template’s Shortcode
Elementor Pro users: On your WordPress Dashboard, navigate to “Templates” and select “Saved Templates”, then Locate the desired template and copy its shortcode.
Free (Elementor) version users: Search for a free third-party plugin, such as Piotnet, that offers similar functionality.